






Hey there! I'm a supplier of Hesco Barriers, and today I'm gonna walk you through how these bad boys are installed. Hesco Barriers, you can learn more about them here, are super useful in a bunch of situations, from flood protection to military applications.
Pre - installation Preparation
First things first, before you even start thinking about putting the Hesco Barrier up, you gotta get the site ready. You need to pick a spot that's flat and clear of any debris, rocks, or other junk. If the ground is uneven, it can make the barrier unstable, and that's the last thing you want. You can use a bulldozer or a grader to level the area if it's a big site.
Next, gather all the tools and materials you'll need. You're gonna need the Hesco Barriers themselves, of course, along with some wire ties, stakes, and a filling material. The filling material can be anything from sand and gravel to soil, depending on what's available and what the barrier is being used for.
It's also a good idea to have a team of people on hand. Installing Hesco Barriers is not a one - person job. You'll need at least a few folks to help with unfolding, aligning, and filling the barriers.
Unfolding the Hesco Barriers
Once the site is prepped and you've got all your stuff together, it's time to start working on the barriers. Hesco Barriers come in a folded - up state, kind of like a big accordion. You need to carefully unfold them. Start at one end and slowly work your way along, making sure not to tear or damage the mesh.
The mesh of the Hesco Barrier is made of a strong, galvanized steel wire. It's designed to be tough and durable, but it can still be damaged if you're not careful. If you notice any tears or holes in the mesh during the unfolding process, it's important to repair them right away using wire ties or a patch kit.
After you've unfolded the barrier, lay it out flat on the prepared ground. You want it to be as straight and as evenly laid as possible. This will make the next steps a lot easier.
Connecting the Barriers
If you're using multiple Hesco Barriers to create a longer barrier system, you'll need to connect them together. This is where the wire ties come in handy. Take the wire ties and use them to attach the edges of adjacent barriers. Make sure the ties are tight so that the barriers are securely connected.
You can also use stakes to further secure the barriers. Drive the stakes into the ground at the corners and along the edges of the barrier. The stakes will help keep the barrier in place, especially if there are strong winds or water currents pushing against it.
Make sure that when you're connecting the barriers, the alignment is correct. The barriers should fit together neatly, without any gaps or overlaps. A proper alignment will ensure that the barrier system is effective in performing its function, whether it's to stop floodwaters or provide security.
Filling the Barriers
Now comes the fun part – filling the barriers! You can use a loader or a conveyor belt to pour the filling material into the barrier. Start at one end and work your way along, filling the compartments of the barrier evenly.
It's important not to overfill the compartments. If you put too much material in, it can cause the mesh to bulge or even burst. You want to fill the compartments until they're about 80 - 90% full. This will give the barrier enough stability without putting too much stress on the mesh.
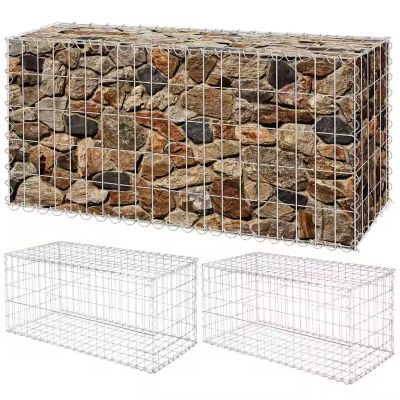

As you're filling the barrier, you can use a tamper or a vibrator to compact the material. Compacting the filling material will make the barrier more solid and stronger. It'll also help prevent the material from shifting around inside the barrier over time.
Additional Considerations
When installing Hesco Barriers, there are a few other things you need to keep in mind. For example, if you're installing the barriers in an area where there's a lot of traffic, you might want to add some reflective tape or markers to make them more visible.
If the barrier is going to be used for a long - term application, you might want to consider applying a protective coating to the mesh. This can help prevent rust and corrosion, extending the lifespan of the barrier.
Don't forget about maintenance. Even after the barriers are installed, you need to regularly inspect them for any signs of damage or wear. If you notice any issues, fix them as soon as possible to ensure the continued effectiveness of the barrier.
Comparing with Other Gabion Products
Hesco Barriers are just one type of gabion product. There are also Hexagonal Gabion MeshPET Plastic Gabion and Sack Gabion. While they all have similar functions in terms of containment and protection, there are some differences.
Hexagonal Gabion MeshPET Plastic Gabion is made of a different material, which might be more suitable for certain environmental conditions. For example, it's more resistant to chemical corrosion compared to the steel mesh of Hesco Barriers.
Sack Gabions are smaller and more flexible. They're often used in situations where a more customized or smaller - scale barrier is needed. They're easier to transport and install in tight spaces compared to large Hesco Barriers.
Why Choose Our Hesco Barriers
Our Hesco Barriers are top - notch. We use high - quality materials in the manufacturing process, which means they're more durable and reliable. Our team has years of experience in the industry, and we can provide you with all the support you need, from installation guidance to after - sales service.
Whether you're a local government looking to protect against floods, a military organization in need of security barriers, or a construction company working on a project, our Hesco Barriers are a great choice.
Let's Connect
If you're interested in purchasing Hesco Barriers or have any questions about the installation process, don't hesitate to reach out. We're here to help you make the right decision for your project. We've got a wide range of products and can offer you competitive prices. So, let's start a conversation and see how we can work together to meet your needs.
References
- Geotechnical Engineering Handbook for Military Engineers.
- Construction Best Practices for Flood Protection Structures.